Showing posts with label DIY. Show all posts

Wednesday, September 14, 2011

DIY: Cobble Time

Did you know that cobblers aren't reserved strictly for peaches or other stone fruits?  Although they are perfectly delicious, human cobblers (not delicious) are people who mend shoes.  With a deep dish biscuit crust.

Anyway, shoes are pretty freakin' important to me and all the other ladies with whom I blog, so I thought it was high time to fix up the sole train.  Here's a small, inexpensive fix for a pesky problem.


Many of my shoes, however beautiful, lack traction in the sole.  I once completely wiped out walking down a newly waxed hallway in the English department, and got some nice new bruises. Deal breaker? No. Dangerous? Yes.  Will you walk like you're on an ice rink, and therefore look less awesome? Double yes.

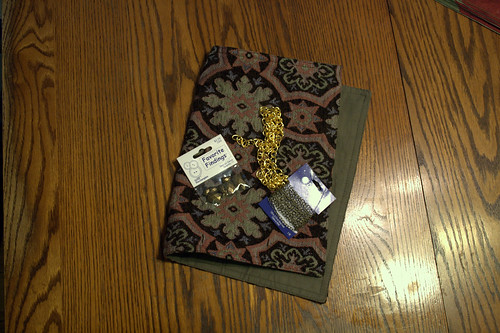
You will need: Scissors, glue (non-toxic and weatherproof, $6 at Michael's), and small adhesive disks.


The disks are usually used for furniture (think the legs of a chair or the feet of a coffee table). I found them at the Dollar Tree for $1.


Spread the glue in a thin layer over the sticky side of the disk, then adhere to the shoe. Try to place according to where you distribute your weight, like the balls of your feet.


I don't have amazing posture, so I put an extra support on the far right of my shoe, since I tend to wear out that part.  Keep shoes stationary and exposed to air, allowing the glue to dry.  When the glue is dry, it will become clear.


Enjoy your new-found stability by runway walking down a bowling alley, a Slip-'N-Slide, or a giant buttered piece of toast.  It costs less than $2 per pair of shoes, and now you can charge your friends to fix their shoes!  You're welcome ;)

XOXO,
Jenni

Thursday, September 1, 2011

DIY Update : Scarf Necklace

Yesterday I posted my lust for a scarf necklace DIY.  Right now its not quite fall enough to wear scarves full on but I still wanna get some use out of them.  So, I thought I'd do a little tutorial.

Also, I am in the wig I bought.  I love it.  No judgement, please & thank you.

Start off with a square scarf, folded into a triangle

loosely fold it into a strip.

Grab the middle


& tie a loose knot.  Fix it so it looks nice.

Move up a little

& tie another knot!

repeat!

tie ends together.

Wear it!

So, is my wig weird?

Hope you try this!


Linking to Let Birds Fly

Wednesday, August 31, 2011

DIY: DIY Round Up

I was totally absent this weekend due to a lovely handmade wedding I went to but I thought for today's DIY I'd do a little round up of somethings I'd like to try:

This amazing sweatshirt turned cardigan found on 
Check that cool necklace too.
This is a great DIY to add to your gym bag or to your casual wear

Totally tubular scarf necklace found here
I have a load of silk scarves that are aching to be worn.  

Hope you had a nice weekend & a wonderful Wednesday!

did you know you could check us out on twitter?

Follow the bloggers

Friday, August 26, 2011

Fashion for Less: Go Pluck Yourself!


Occasionally I consider small ways in which I can cut back my spending, and so far my tactics of not buying coffee on my way to work and trimming my own hair in between cuts have saved me a lot of cash.  Doing your own eyebrows is another way to cut back on routine beauty spending.  Although it’s affordable enough to get them waxed once and then tidy them up around the edges, it is also very simple to do it yourself from square one!

messy hair but good brows....


When I was younger my mom used to coerce me to go get my eyebrows waxed and I begrudgingly obliged.  Then I would just let them get all teen-wolf until she would drag me back to the salon.  I just really did not care.  But as I got older I realized the appeal of having lovely arched brows.  It was an important component to the vintage style I was slowly adopting.  So, I read up on the subject (I think in Seventeen sometime in high school and the beauty section of Border’s) and that knowledge plus my few years of experience is what I offer to you today. 

The most important thing about having beautiful brows is the shape.  This should be determined by the amount of plucking you do to the bottom of the brow.  Generally, I would say to avoid plucking the top other than to tidy it up, or else you’ll end up with a pencil thin line that looks cartoonish.  So how do you determine where to arch, the length, or the width? Well, if you hold up your tweezers (or in my illustration a red crayon) to your eye right at your tear duct and follow the line up, that’s a good place for them to start.  If yours are naturally a little more or less, that’s fine. This is a rough guideline and as long as you’re not into unibrow territory you have some leeway.

 
For the ending point hold the tweezers up to the angle of your lower eyelid like this:


That’s about where they should end. 

Now’s the part you’ve all been waiting for, the arch.  Do a similar move by putting the tweezers at the lower curve of your iris (the colored part of your eye) and that’s where the arch should begin.  Like so:


(Now, if you have a pretty straight across brow with little thinned out hairs on top it is helpful to take some powder and an angled brush and fill in those spaced out hairs to help create the angle you want before the next step.) 

Then carve out a triangle from the bottom to make the arch.  The idea is that the first part should be the thickest and then gradually thin out to the point at the end.  

What I like about this method is that it works on all different types of brows and on all different types of faces.  It doesn't create a uniform shape like some of the at-home waxing kit templates do, rather it allows the unique nature of the brows to remain in a more polished form.  

Soon, I'll post some photos of me putting this plan into action on people other than myself.

pleasant plucking!


Wednesday, August 17, 2011

DIY: Change Your Clothes

So, I have this dress. I got it for $4 at Ross, and because it was such a good deal (and my size), I couldn't pass it up. I like the graceful, flowery print, and the fit was unexpected on a simple sundress.  But I didn't love the neckline. 


It was so boxy, and square, and changed the otherwise interesting fit of the garment.  I'm not really interested in cleavage, but it needed something.  So I changed it to a sweetheart neckline.

Step 1: Spread your garment on a flat surface, face up, and decide where you want to make a change.  I simply pulled the points in until they formed obtuse triangles (I think) and gently marked the corners with dots inside the folds.


Step 2: Thread your needle.  Carefully.  I used only about six inches of thread, and doubled it, so that it would be stronger.  And easier to hold when knotting the thread.  Match up your marked points, then insert the needle, pulling your doubled thread through to the point where you can make another stitch.  Continue sewing up to the seam, then repeat on other side.  


(Note: I had to move to the other side of the garment, since I can't do diddly with my left hand, apparently.)


Step 3: You're as close to done as I got for today, though I may come back and embellish with some buttons.  If you choose to do this, studs work nicely on little frilly dresses.

So, now what do you do?  Why, reinterpret Alice in Wonderland, of course!


Dress: Ross; bow: Forever 21, tights: DKNY, amazing shoes: Poetic License (at Gabe's), jewelry: Betsey Johnson (Nordstrom Rack)
Artwork: Urban Outfitters

Little quirks like this make your clothes look and feel tailored and expensive.  Yes, I'll have to hand-wash this now, but it's worth the wear.  Do you have any awesome projects in the works?

XOXO,
Jenni

Wednesday, July 13, 2011

DIY: Getting in the Skein of Things- Knitted Summer Accessories for the Scarf Lover


Hi, my name is Amy and my favorite season is winter. This is a fact about me that seems to illicit strange looks from most people.  I just can't help but to love being able to completely cover my body in as much fabric as possible, and sadly this is just not practical in the summer months.  Especially not this week, with highs in the mid-nineties.  Despite this, I was suddenly inspired this weekend to pick back up one of my most beloved winter pastimes: knitting! This came about because one of my good friends (who happens to be studying fibers at JMU) made an awesome electric blue crocheted necklace that somehow beautifully and gracefully captured her refined DIY aesthetic.  She made a long single strand (I’m talking really long) and then wound it around her neck to create a many-layered necklace.  It has all the soft cuddliness of a scarf with none of the heat.  It looked something like this, although this is a version my mom and I recreated for you guys out of some olive drab yarn I had laying around.


I also decided to make my own design for a necklace by knitting instead of crocheting (because for some reason that’s easier for me).  I made it 6 stitches across and just kept on going until I could wrap it around my neck a few times.  In the photograph I twisted it a few times and tied it into place to give it the swirled look.  The haphazard nature of these projects is so attractive to me because they can be as simple or as complex as I (or you!)  want.   They could be used as a necklace, headband, belt, or bracelet. You could sew buttons on them or weave beads into them, and best of all, you can pretty much quit as soon as you get tired of doing it and still have a wearable item.  They make great projects for beginning crafters, and immensely gratifying ones for those who are more experienced. 


Needless to say, this is a great use for that weird leftover half-skein that’s taking up space in your life.  Even if you bought yarn to make them you could easily make 4 with one skein (which costs between 2 and 5 dollars usually).  So cheap.  

Beginners can easily replicate my design and my friend’s design with these directions from Lion yarn.


For those experienced with knitting and crocheting, this pattern from Aromy’s Originals will give you a more challenging and lovely necklace from your leftovers.


Anyone else have creative and fashionable uses for leftover craft goodies or yarn?  We’d love to hear about them!

Happy Crafting!
Amy
 

Tuesday, July 12, 2011

We Love Today: I Always Need More...

Accessories!!
That's right, I love me some accessories.  Working at Claire's for about 3 years didn't help either.  I'd walk out of the store after each shift having bought loads of rings, necklaces, etc.  I loved it!  I got to see the new things before any one else did.

I am sure you all know about pinterest, so here are some things I love 

ps. you can follow all of our pinterest boards by clicking on the links in the side bar!


I took a jewelry class in college where we cast rings & what not.
I would have loved to take it again because the first time was all about learning how to make things.
I never really got the hang of it until the end of the class.
I love silver & gold together.  Is that wrong??


This watch just screams style.  I have a thing for collecting watches.
Well, let's say I have a thing for collecting things
I think this can totally be DIY'ed! Stay tuned for an update on that!

It's about the middle of summer now & you would think I'd have my full summer wardrobe all put together.  But since I've been moving, that is totally not the case! 
I still have loads to bring over to the new house.

Do you have any Summer accessory staples?
Is there something you wear all year round?


Wednesday, July 6, 2011

DIY: Carpetbagger - Tapestry Envelope Bag

Hello all, Moe here with a fun (and cheap) ! As you know we are from Virginia, I think I am the most South of everyone, & I love carpetbaggers - stylish tapestry bags I mean!

This DIY is a cute summer tapestry envelope bag made from some great & cheap stuff from the Dollar Tree & JoAnne Fabrics

If you know anything about me, you know that I love print & pattern!  I've always admired heavily embroidered bags - ones that are granny chic.  I found some inspiration on pinterest, too!


And what does the end product look like?

Cool eh?

What you will need:
Placemat, length of chain, two large jump rings, permanent fabric glue, needle & thread, or sewing machine, beads/studs/etc


Step by Step:


Take the place mat & fold it twice to create a clutch shape.
experiment with placement to ensure that the flap will stay closed on it's own
Pin & sew up the sides


Grab your length of chain & jump rings.
Poke the jump rings through the placemat.
(this may take a few tries & something sharp...I gave up & sewed my chain on)
Since I wanted a double chain look, I wove a smaller chain through my bigger chain.
This will make it stronger & distribute the weight since the chain was sewn & not attached with jump rings.


Embellish with beads/studs/etc
These I found in the button aisle of JoAnne's. At first I had some wooden beads but I liked these stud like things better.


Pair with your jeans or cut off shorts.  Perfect for a night out or off to work.
Tuck the chain in in order to carry it as a clutch then when you need your hands, pull out the chain & throw it over your shoulder!

I plan on switching out my purse so I can wear this bag to work tomorrow!

Have you DIY'd something perfect & love to show it off?
Let us know, send your fave links & projects to 

What will you try this summer?

Related Posts Plugin for WordPress, Blogger...